Design Tips
Learn More Below
Design Tips
For over 25 years we have been in business designing custom frameless shower enclosures, in that time we have come across just about everything. From design flaws, to Do-it-Yourself disasters that are just too dreadful to even mention. So, we created design tips to help guide you, as well as illustrate for you what to avoid when preparing your opening for a Frameless Shower Door.

Design Tip #1
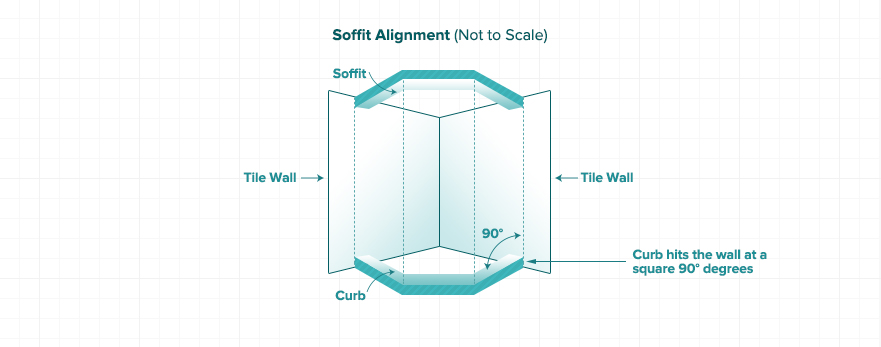
Never design a curb (the sill that is under the door area) on an angle. This applies to 135 degree standard angle enclosures, 90 degree enclosures, as well as custom angle enclosure openings. Always design a curb so the door can swing freely in and out. The only way to do this is by making the curb hit the return knee wall or angle sill at 90 degrees (square).

Design Tip #2
Always pitch seats and shower floor pans so the water drains properly to the drain area. You do not want water to be stagnant or puddling will occur. Always pitch the curb sill under the door, on knee walls, and under all fixed panels approximately 3/16” in towards the interior of the shower enclosure to ensure proper drainage with no stagnant water buildup. Always try and use a continuous piece of marble or granite to minimize grout joints under the glass.
Design Tip #3
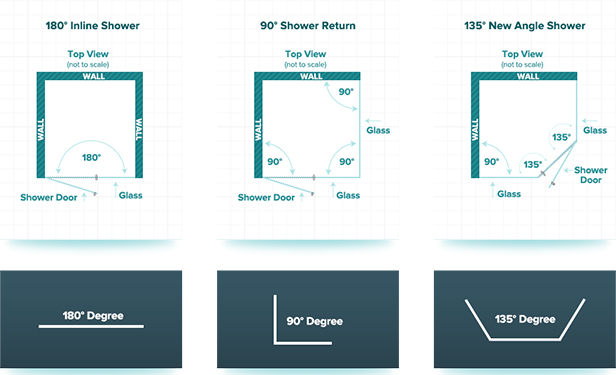
There is nothing standard about a frameless shower enclosure, but you should always work off of standard angles when possible. 90 degree, 135 degree, 180 degree angles are your standard in the industry.
Design Tip #4
For best results the soffits must be plumb to the lower curbs. The will ensure satisfaction on your design and give a perfect reveal.
Design Tip #5
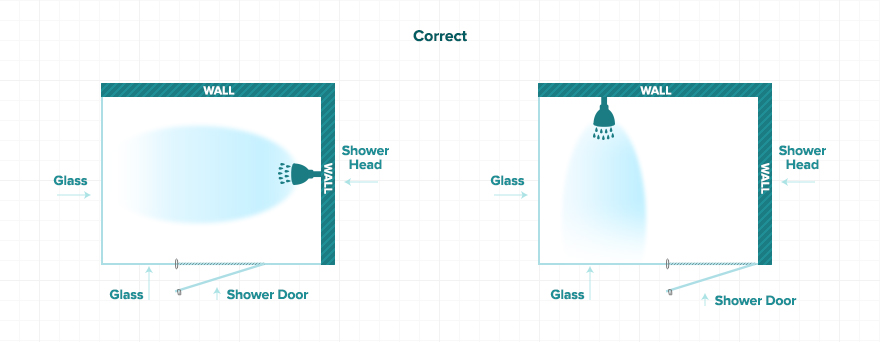
For best results, all body sprays should be directed towards the tile wall or fixed panels. Keep direct water spray away from the door. Never install body sprays directly opposite an enclosure door or opening. The only vulnerable area of a frameless shower enclosure is the door! So try to always keep direct water spray away (body jets and shower heads) from the door to ensure less water from escaping.
Design Tip #6
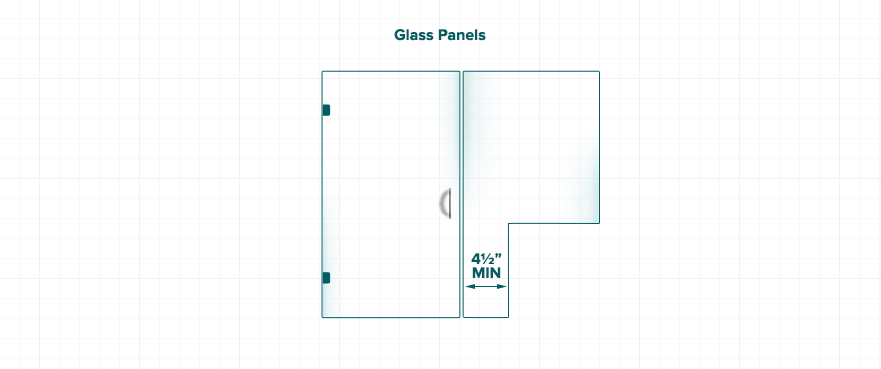
Due to polishing and tempering procedures a 4 ½” minimum width is required for glass panels.

Design Tip #7
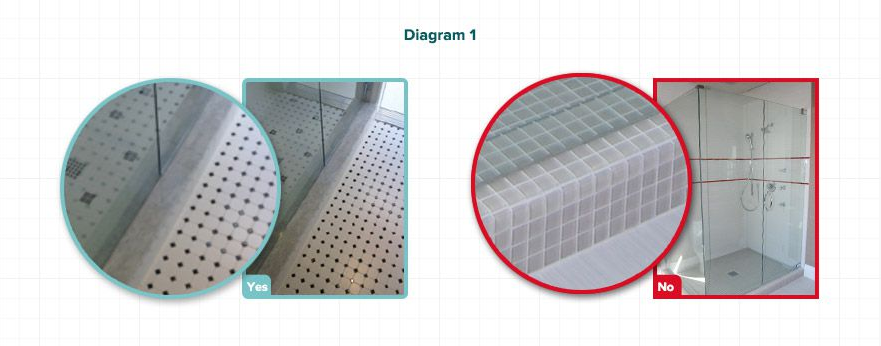
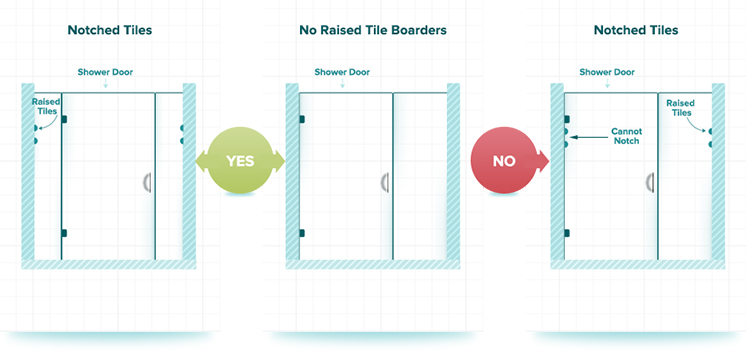
If you are planning to use a decorative listello raised border or any border for that matter, always use one that is flush or flat with the other tile in the shower door area. If you choose to use one that sticks out past the wall tile, make sure it stops before the door area. Nothing should be protruding out that would interfere with the door swing.
Design Tip #8
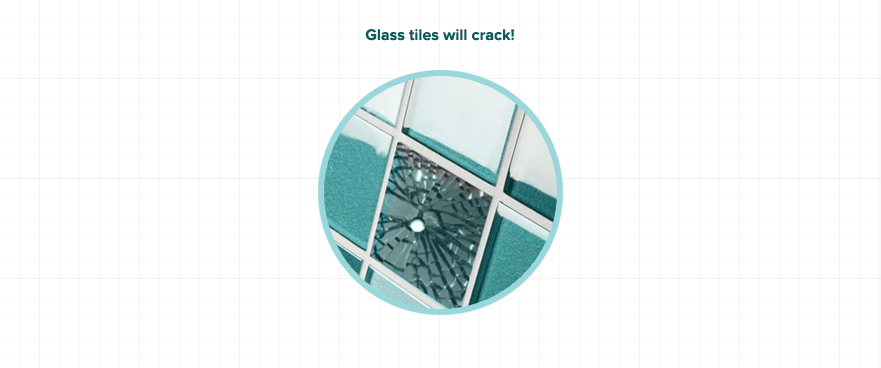
Never use glass tiles! When considering a frameless design that would require drilling into the tile. Inevitable the glass will crack during the drilling process, or over time.
Design Tip #9
Any overhangs near the door opening may cause problems, such as gaps, that will result in serious leaking issues. Always run the tile flush with the vertical rise tile.
Design Tip #10
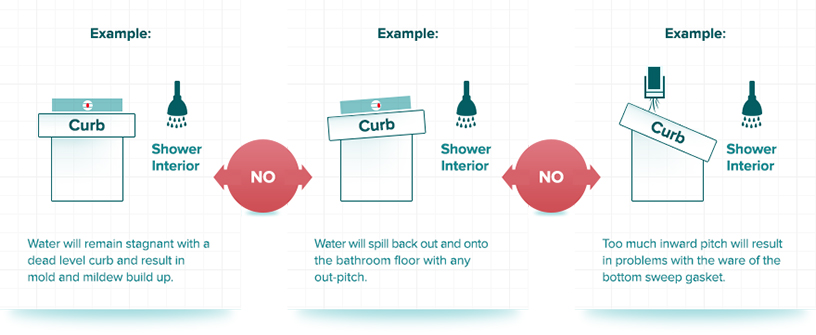
Pitch guidelines for shower curb. See below.
Design Tip #11
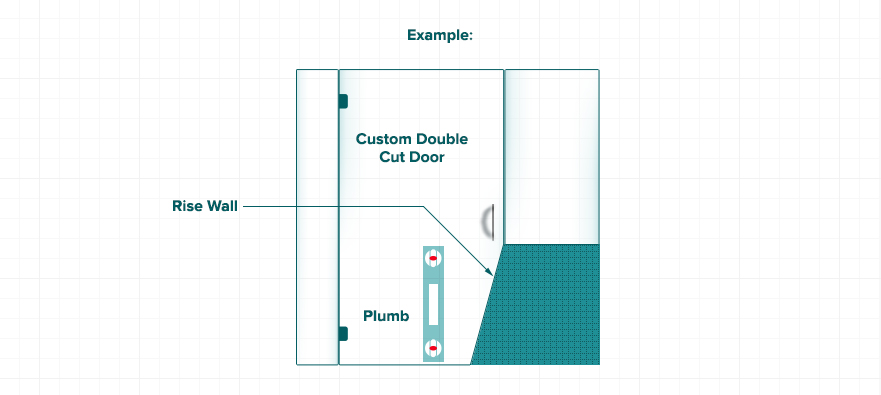
Always level the rise where the door closes this is most important; otherwise a costly custom double cut door is required.
Design Tip #12
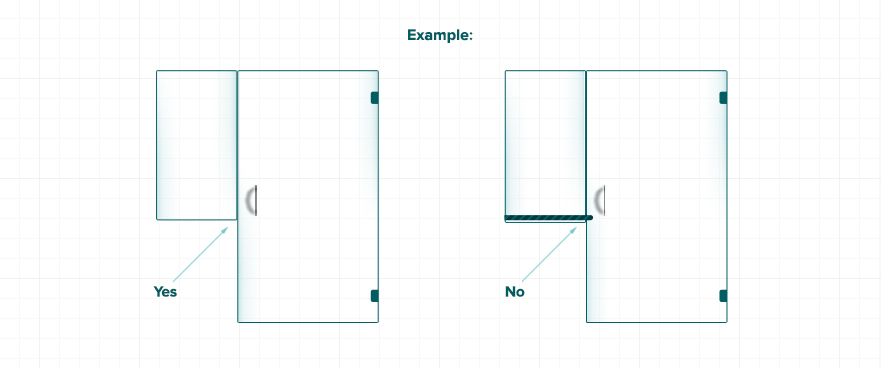
When a return panel of glass that sits on a knee wall or a tub deck requires the glass to be notched, make sure the “leg” is no smaller than 4 ½” or a separate piece will need to be added creating another seam that can be avoided.
Design Tip #13
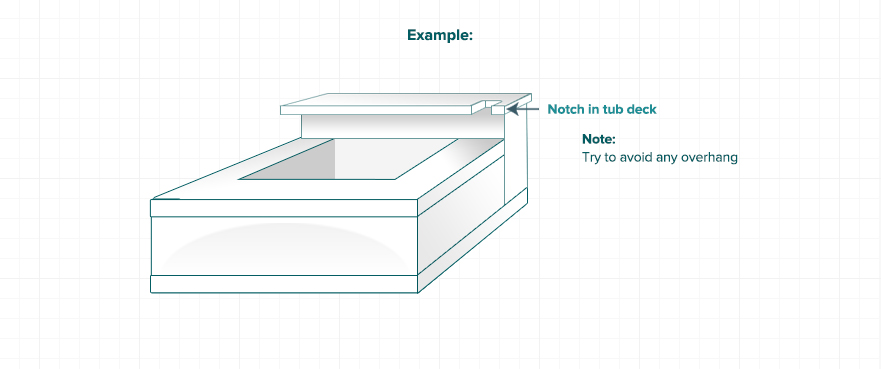
When a return panel of glass that sits on a knee wall or a tub deck requires the glass to be notched, make sure the “leg” is no smaller than 4 ½” or a separate piece will need to be added creating another seam that can be avoided.
Design Tip #14
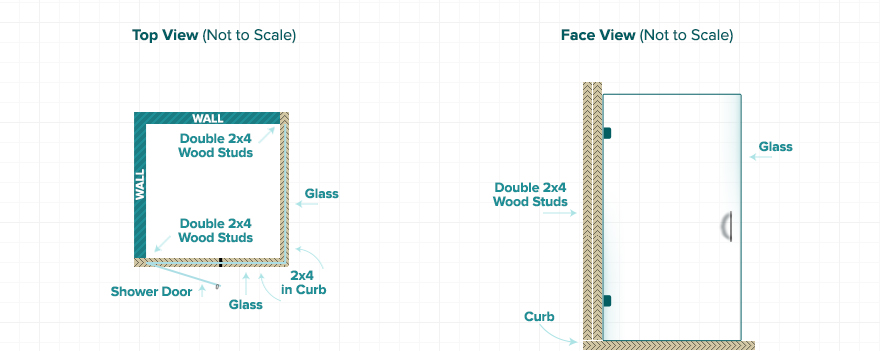
Always install a vertical wood stud where the door hinges will be placed or fixed panels are to be clipped too. Never run wires or pipes through or in front of the studs where the anchoring will be done. If you already did put pipes or wires where they shouldn’t be, make sure you tell us and we will manufacture the glass to ensure the screws miss them when the installation takes place.
Design Tip #15
If you are designing an enclosure that has a knee wall, always allow enough of a ledge for a small panel to join the 90 degree return panel that goes on top of the knee wall. This not only creates a small shelf and more room in the shower area, it secures the larger return panel eliminating almost all the flex from the 90 degree return piece.
Design Tip #16
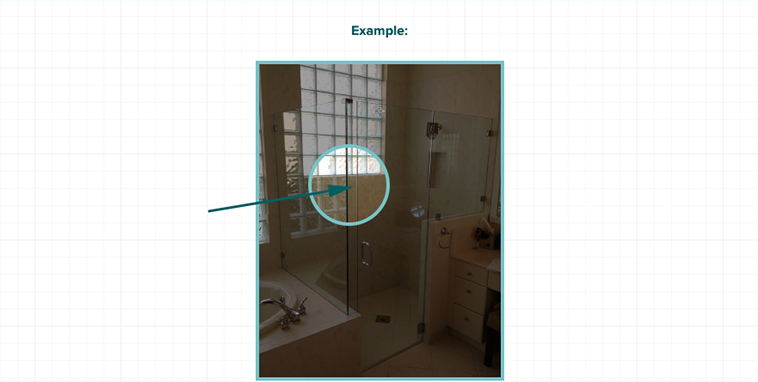
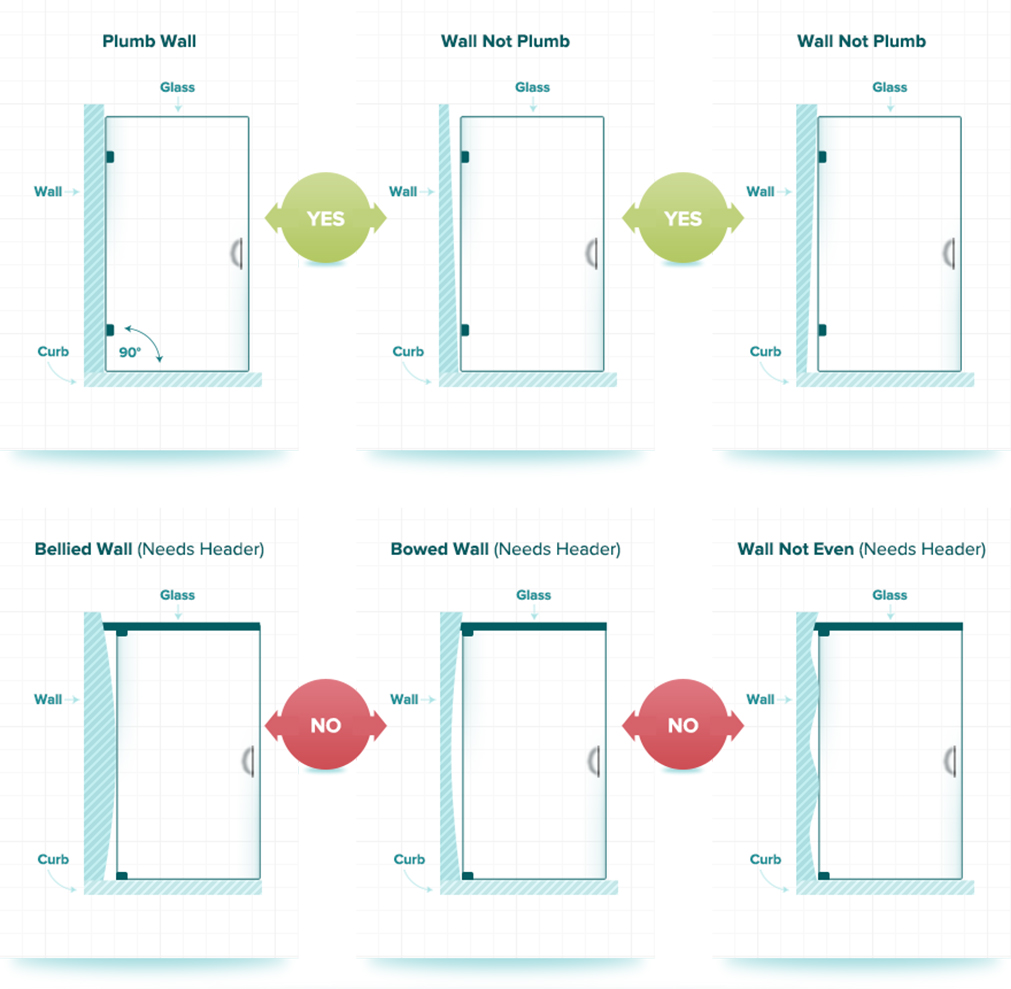
Walls which meet a door or a glass panel DO NOT need to be exactly vertical or “plumb” in order to prevent gaps, uneven joints, etc. Here at Frameless, we specialize in custom cutting your glass in house to conform to out of plumb walls (not level or perfectly straight). Other companies will tell you that this is not possible. We are telling you it is! It is very rare that we cannot configure a frameless shower door or enclosure to accommodate even the worst of openings.
The images under Yes mean we can use a wall mounted hinge. The ones that say “need header” simply means we can cut the glass to the belly or bow or even high points of tiles that stick out, we would just have to use a header to offset the hinges to accommodate a bad tile job.
Design Tip #17
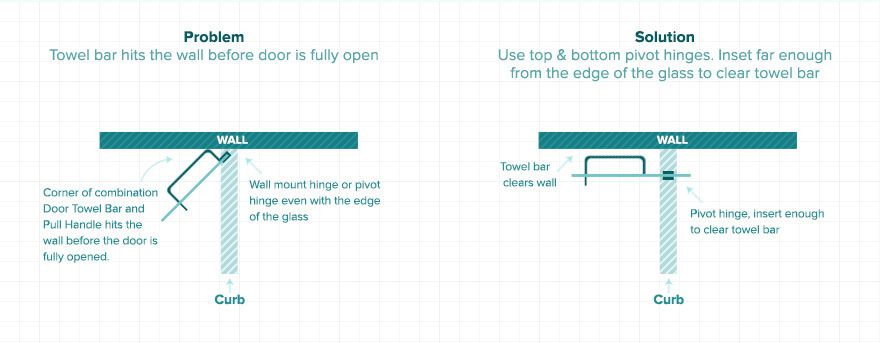
Be careful where you place your towel bar! Remember, we are here to help. If you have a question or concern, please let us know and we will make sure issues like this one does not happen to you.
Need Help? An Expert will Call You!
